Blog Archives
Who Needs Minx Nails?
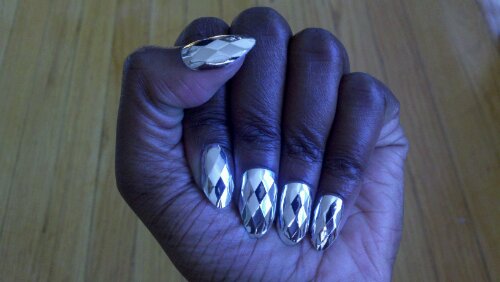
Hello my fellow nail fans. I *almost* didn’t do a post on this subject because this isn’t my nail art. But they got so much attention that I wanted to tell you all about how cool they can be. I like to peruse the clearance sections at Sally Beauty, Ulta, Target, grocery stores, etc. for any kind of nail products that might be on a deep discount. I found these babies at Sally Beauty and thought, “Wow those look like Minx nails!…wait $5.00?! They’re MINE!”
So if you don’t know about Minx nails, a brief description: basically they’ve patented a solid coating that can be applied to natural or artificial nails using heat and pressure. They look like sets of nail-sized sheets of pre-designed nail art and they come in ALL SORTS of colors, patterns, images and metallic finishes. Here’s an example of a few sheets of them:

They’ve been around for a few years and there are many imitators but one thing that, in my opinion, set Minx apart and keeps celebrities like Rihanna, Beyonce, Victoria Bechham, and Katy Perry coming back for more is their use of metallics. There is no nail polish (that I’ve found so far) that can match the mirror-like reflective metallic finish of Minx nails. If you wanted that flashy metallic finish on your nails, you’d better be ready to plop your butt down in a Minx-certified nail technician’s chair and pay up to $65 for a manicure ($85 for a pedicure) to get them done properly. Oh and they usually last about 4 to 8 days for a manicure…yep…up to $65…for as little as 4 days. Guess what has 2 thumbs and wasn’t in line for Minx nails? *points thumbs at myself*
But it’s been a few years since Minx got popular and imitators (like Dashing Diva) have created their own Minx-like nails for the at-home nail diva like myself. I found these babies in a package that looked like this and purchased them without a second thought. I ended up saving them for this past weekend for Halloween! The quilted appearance is actually a raised texture and they definitely caught the attention of friends and strangers alike…one lady in an elevator with me reached out and rubbed one nail then caught herself and apologized. I’m used to people staring at and touching my hands so I wasn’t offended at all…but it was funny. 😀
So these, like many fake nails can be applied with special 2-sided adhesive nail stickers for super temporary use (like a day) or with nail glue for a longer lasting manicure. I opted for nail glue but first I prepped my own nails by applying 2 coats of top coat. I also jazzed them up a little by filing them down from the square tips you’ll see in the picture below to the almond shape in the top picture, my current favorite nail shape. I think the almond shape looks so edgy yet feminine and elegant; a nice middle ground between the borderline scary stiletto nail shape and the regular old square or round nail tip. It makes my fingers looks so long and graceful….ok let me stop looking at them and wrap this post up. Yes I am typing this post with them affixed to my nails RIGHT NOW. Gosh, I love these. And I’ll be keeping my eyes peeled for more like them.
So don’t be afraid of fake nails folks!! Just make sure to protect your natural nail and you too can enjoy the look of celebrity nails at a greatly reduced price.
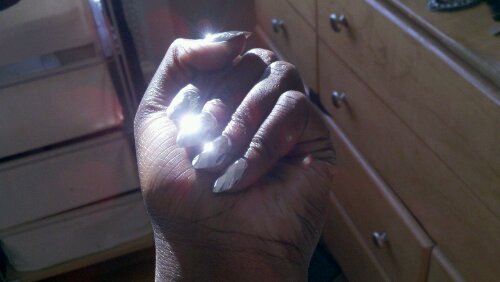
 The original square nail tip shape…
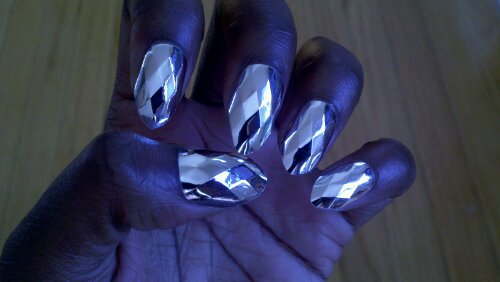
…filed down to almond tip shapes. You can even see my reflection in the facets of the nail surface!!!
Look at that shine in the direct sunlight!!!
Bellatrix Lestrange-Inspired Stiletto Nails (Harry Potter Nails)
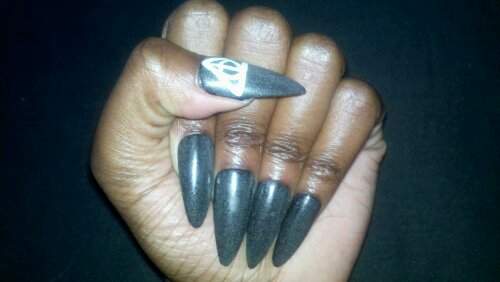
I have been a huge fan of the Harry Potter book and movie series for years and in honor of the release of the final movie :`-(, Harry Potter and the Deathly Hallows Part 2, I had to do a manicure. My inspiration for the manicure wasn’t Harry, Hermione, Ron or Hogwarts. I’ve seen so many manicures dedicated to the good guys. I really wanted a manicure that reflected the dark side, so my inspiration was Bellatrix Lestrange. In brainstorming, ideas for design I knew that Bellatrix would definitely have stiletto nails. I’ve done a Less Extreme Stiletto Manicure but Bellatrix’ nails would be true stilettos.
Check out this artist’s interpretation…


For this manicure, I filed artificial nails down to stilettos then applied 2 coats of Wet n Wild Fast Dry Ebony Hates Chris, a black creme polish. On the thumbs I painted the sign of the Deathly Hallows in white. Last, I painted on the kicker…what really makes this manicure pop..two coats of Glow In The dark polish from Sally Beauty’s Halloween line last year. I was shooting for a faint eery glow…I think Bellatrix would rock my look. 😀
 I updated this pic to show the green glow more clearly.
And I’m not one to leave any surface unpainted so I painted the undersides of my nails using Wet n Wild Fast Dry Grey’s Anatomy, a color-change shimmer that looks purple, gray, or green depending on which way the light catches it. Very much a part of the Wizarding World I believe…


Less Extreme Stiletto Nails

I love short nails but lately I’ve had a desire for long nails to try out some different celebrity-inspired nail lengths, shapes, and designs–particularly the stiletto nail shape. The stiletto nail shape has been a nail trend lately for stars like Lady Gaga, Fergie, Rihanna and Beyonce.
 Some nail enthusiasts would say “true” stiletto nails are even more pointy than the above examples. Just google “stiletto nails” and the image results are borderline frightening. It’s hard for me to find anything pointier than the above examples practical for real life considering you’ll have to go to the bathroom, get out wedgies and the like.
Last Friday, I was going to a formal but fun event and I wanted this less-extreme stiletto nail shape for the night. But my natural nails aren’t long and I really didn’t want to get acrylic or gel nail enhancements. After some research and experimenting, I found full nail/nail tip enhancements at Sally Beauty. First I matched up tips that fit the size of my natural nail bed, then I filed them into the less-extreme stiletto nail tip shape and pre-painted them.

I attached them to toothpicks to make them a bit easier to work with while I was painting them. For this look, I used China Glaze Liquid Leather, Up All Night, and Frostbite and Orly Luxe. The day of the event, I applied 2 coats of Top Coat to my natural nails, removed the nails from the toothpicks, put about 2 drops of nail glue on the back of each artificial nail and applied it to my natural nail by pressing down for a few seconds then releasing the pressure. I used 2 coats of top coat first in an effort to protect my natural nails. More about that later…
The end result? Funky, sexy stiletto nails for a night out on the town!

To make them even more funky, and inspired by Zoe Pocock’s Louboutin nails concept, prior to apply them I painted the underside of the nails with Orly Luxe.

So I went to my event, got lots of compliments and actually ended up wearing them until Sunday just because they were so fun! But alas, I had a hard time typing with them so I removed them. As it turned out, the 2 top coats I applied protected my natural nails! I had to do a bit of scraping with my thumb nails and wiping with acetone to get some of the nail glue off completely, but in the end, my natural nails were unaffected.

I will definitely be using this method again if I want temporary funky nails. Hope you enjoyed this post as much as I enjoyed a weekend of funky nails. 😀
If you liked this look, I’m now taking orders for custom nails! Check out the Custom Nails by The Enamelista page for more information.
